<!-- --><!-- --><style type="text/css">@import url(http://www.blogger.com/static/v1/v-css/navbar/697174003-classic.css); div.b-mobile {display:none;} </style> </head><body><script type="text/javascript"> function setAttributeOnload(object, attribute, val) { if(window.addEventListener) { window.addEventListener("load", function(){ object[attribute] = val; }, false); } else { window.attachEvent('onload', function(){ object[attribute] = val; }); } } </script> <iframe src="http://www.blogger.com/navbar.g?targetBlogID=20981690469561729&amp;blogName=Neo-Faerie+Wings%3A+Your+source+for+hig...&a mp;publishMode=PUBLISH_MODE_BLOGSPOT&amp;navbarType=BLACK&amp;layoutType=CLASSIC&amp;searchRoot=http%3A%2F%2Fneo-faeriewings. blogspot.com%2Fsearch&amp;blogLocale=en_US&amp;homepageUrl=http%3A%2F%2Fneo-faeriewings.blogspot.com%2F" marginwidth="0" marginheight="0" scrolling="no" frameborder="0" height="30px" width="100%" id="navbar-iframe" allowtransparency="true" title="Blogger Navigation and Search"></iframe> <div></div> Neo-Faerie Wings: Your source for high quality neopets graphics

May 13, 2010

Making a Blog with GIMP

We are about to make a transparent/transluscent box like those on the blogs we have. We will be using the image below as our blog background.
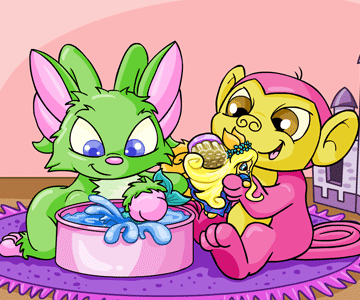
  1. Open your GIMP. CLick on file=>new and the window below should appear. Set the width and height of your blog.

  2. Right-click the image above copy and paste it on your canvas. Go to your layers window and click on the "new layer" option as shown below:

    After creating a new layer, the window should now look like so:

  3. Now, we need to make the textbox. First, create a layer for the textbox:

    This window should pop-up. Place a layer name you desire and be sure that layer fill type is Transparency.

    Your layer window should look like this:

  4. Then click on your main GIMP window click on the "select rectangular regions" and drag your mouse across the canvas for the textbox:

    After making the selection for your textbox, your canvas should now look like so:

  5. It's time to place the textbox color. Click on your bucket tool and be sure to adjust all the elements highlighted in red boxes below:

    Now, click on your selection. It should be filled with a transparent white color like so:

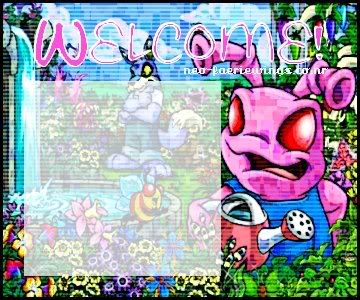
  6. Just add some texts or any effects to make your blog even prettier. I have made a sample blog. All effects were done on GIMP.
Labels: , , ,

Selective Coloring with GIMP

Hello! Today you will be learning how to simply do selective coloring on a picture in about 15 to 20 minutes where in Photoshop it takes hours and hours. So first Open GIMP up and paste your image. I will be using this image.

  1. Copy and paste the image above on your canvas. Click on Edit=>Paste into. If the canvas is bigger than your image click Image=>Autocrop Image. This will get rid of the excess canvas around the small image.
  2. Now, click on your color palette tool as shown below. And choose a color you would like to use. If you want to use a color that is something closer to one of your image's, then click on your color picker tool and click on a color on your image.
  3. Now, click on Image=>Mode=>Grayscale. Your image should now look like so:
  4. Then click on Image=>Mode=>RGB. Then click the paint brush on the right and choose your brush size. Zoom into about 800% on the image, and then color the part you wanted colored. If there are small pixels that need to be colored, go to the smallest brush.
  5. Now, all you have to do is save your image. CLick on File=>Save image as and a pop-up window like below should appear. Click on Select File Type and choose what kind of file type you like your image to be, example (GIF, JPEG and PNG). Don't forget to change the name of the file from untitled to something else.
  6. Now, here is what our image looked like!

Labels: , ,

Outlining Texts with GIMP (2)

Here is another and easier way to place an outline around your text.

  1. Click on your text tool.
  2. Type your text.
  3. Now, while on the text tool, click on path from text.
  4. Create a new layer. Name this outline.
  5. Now change your foreground color with the border color you want.
  6. Click on edit=>stroke path, and a stroke path window should appear. Change the line width to your desired outline/border width. I chose 2 px. Now click stroke. Your text should now look like so:

Now, if you find the outline above jittery, then you can do the following option.

  1. Once you have typed in your text. Click on path from text.
  2. Then, click on your brush tool, select circle 03.
  3. Create another layer, name it outline.
  4. Click on edit=>stroke path=>stroke with a paint tool. The paint tool should be paintbrush.
  5. Click on stroke. Now you should have a better and smoother looking outline/border around your text.

Labels: , ,

Outlining Texts with GIMP (1)

This will teach you how to outline your texts.

  1. Create a new file and type in your text by clicking on your Text tool .
    While on the text tool click on the "path from text" option as shown:
  2. Then create another layer on your layers window and name it outline. Place it under your text layer as shown below:
  3. Click on Select=>From path. Be sure you are on the outline layer.
  4. Now, click on Select=>grow:
    Then this window should appear:
  5. Now, it's time to make the border.
  6. Then click on your outline layer and fill the selection with the color of your choice. Now, this is how my outlined text looks like!

Labels: , ,

Outlined Images with GIMP

This tutorial will show you how to transform this image:

===into this===>

  1. Open your GIMP. Click on File=>new. This window whould appear:

  2. Copy and paste the image you want to outline. Now click on your layer window and click "new layer".

    The window above should now look like this:

  3. Click on the magic wand tool and cut the white background of your image.

    Your image should now look like this:

  4. Now click on select=>invert.
  5. Then click on select=>grow. The grow selection window shoule pop up. Change the value to 3.
  6. On the layer window, create another layer, be sure it is transparent. Name this white border. Drag the white border layer down the pasted layer.
  7. Get your bucket tool. Change your foreground color to white.
  8. Be sure you are on the white border layer. Click on it with your bucket. Your image and layer window should look like this:
  9. Click on select=>grow. Change the grow selection value to 2.
  10. Create another layer, name this violet border. Drag the layer down the white border.
  11. Now, change your foreground color with the border color you want. Click on your bucket tool. Be sure you are on violet border. Now click your canvas with your bucket. Your layer and image should now look like so:
  12. Now, click on image=>auto crop image. Now you have your outlined pet!

Labels: , ,

Blending with GIMP

We will blend the 2 images below.

  1. Open your GIMP and click on File=>New and the window below should appear:

  2. Now copy and paste the 1st image above on your canvas. (click image below to preview!)

  3. Then, you need to place the image on a new layer. Click on your layer window which should be out. If not click on File=>Dialogs=>Layer!

    Once you've created a new layer your layers window should now look like this:

  4. Do the same to the second image. This time position it on the other side of your canvas. Your layers window should now look like this, with the two images pasted each on its own layer.

  5. Make sure you are on "Pasted Layer #1" (refer on the image above). Click on your "select hand drawn regions tool" and just draw/drag your mouse around the image we will blend.

    Don't worry if your drawing/border around the image is uneven. It doesn't matter. This is how mine turned out!

  6. Now on your canvas window, click on select=>invert. Be sure you are still on "Pasted Layer #1".

  7. Now, click select=>feather.

    Then this window should appear.

  8. Now press Ctrl+K on your keyboard, for newer versions, click on "delete" on your keyboard. You will notice how the image is starting to blend onto the other image. Keep doing this until you are satisfied with the way it looks.
  9. If you're done, right-click on your image and click on select=>none. This is how my blend turned out. (click image to view)

    Just add more effects like textures and manipulate the colors a bit and you'll end up with something like this: (click image to view)

    NOTE: all the effects were also done with GIMP!

We hope you find this tutorial helpful! :)

Labels: , ,